 Objective: Demonstrate your understanding of composition
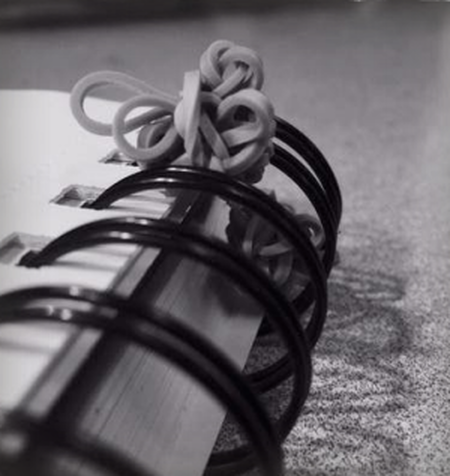
Materials • Cameras • Small objects like paperclips or rubber bands • Composition is a key secret to making great art. • Composition can make even boring objects look interesting. • You are challenged to prove that even objects like paperclips and rubber bands can become interesting when arranged well. Check out the art work by Steve Axford. Create: Get into groups of three or four students- Make sure that your group has an expert in it. Get objects that are quite simple Work together to come up with four pictures of their objects with strong compositions. Edit as you go. It often takes multiple tries to get a winning shot Place the four examples into a presentation and label each example- You may use Adobe Spark, Google Slides or other presentation. Turn this into classroom Types of Compositions: Rule of Thirds Golden Ratio Leading Lines Framing Diagonals Figure to Ground Fill the Frame Center the Dominant Eye Patterns and Repetition Symmetry
0 Comments
Watch this video...
https://mass.pbslearningmedia.org/resource/i-could-do-that-artassign-1062 Design Challenge: Create a logo for YOU that represents who you are as an artist and designer.   Here is a great article to read about LOGOS
Process: 1. Sketch and write down 5 elements of who you are and what makes you special 2. Use Color Palette maker or other app to select colors that best represent YOU 3. Use Illustrator or Photoshop create a logo that contains a visual element and text with your name or name of your design company 4. Critique and evaluate if you are expressing your original 5 elements in your work! Design Challenge:
The typical dorm room is usually a pretty boring space. Dream up a new dorm room. What will be the unique features of your room? Steps: 1. Research Collect images of what a typical dorm room is like. What size is it? Are there any restrictions about what the room can and can not have? What furniture usually comes in the room. How much does a typical dorm room cost? List what items your room must have 2. Dream Search and create a room that has the unique features that you would like to have 3. Create You may use Photoshop to create your dream room or Sketch Up Evaluation: Originality of Idea Ability to show concept Skill/ Craftsmanship Participation Digital Art Peer Critique
Select a partner to work with. Ask them to show you the three works of art created this quarter. Have them share the jpegs with you. Place them all in a document and write a brief critique of each work of art. Use the “Sandwich method” for positive feedback and suggestions! Use the following format for the critique: 1) Description: Look at the artwork. Describe what you see like a good reporter or detective. Use objective, factual words. Looking at the elements of design, describe what qualities you see? Line, Shape, Color, Value, Texture, Space 2) Analysis: Analysis means you look for relationships. To find relationships among visual elements, look to the principles of design. a) Emphasis. Is there a dominant element or one that you see first? Why? b) Balance. Is there a special balance, or “weight,” among the elements? What mood does it create? c) Proportion. Do the proportions look normal, Ideal or unusual? Why? d) Pattern. Are elements repeated to create a pattern? Where? Why? e) Rhythm or Movement. What visual rhythms or paths of movement do your eyes follow? Where? Why? f) Unity and variety. What elements bring together, or unify, many parts of the design? Why? What elements add variety? Why? 3) Interpretation: Use the information you have gathered to tell what the work means to you. Use analogies and language with adjectives and adverbs. Example: “The lively, angular shapes seem to be dancing.” State main themes, or hypothesis, that could explain what the artists wanted you to see and appreciate. . a) What does the work makes you think or feel when you look at it? b) Do you think that this work is successful, and why? c) What kinds of reasons can you give for your idea of why this is a good or bad art work? d) Describe the qualities you find in the work? e) Does the work remind you of other things you have experienced? f) How does the work relate to other ideas or events in the world and/or in your other classes? 4) Judgment: Give your opinion on the work's achievement or failure. Consider why you are judging an artwork and the criteria, or standards, you should use a) What parts of the work make you feel it is a success or failure? b) What criteria (think of the style of the work) can you list to help others judge this work? c) How unique is the work? Why do you feel this work is or isn’t unique? This assignment was originally posted by Mr. Ratkevich here:
http://www.burlingtonhighschoolart.org/digitalarts/Lessons/Entries/2014/12/19_Photo_Restoration.html For this project, you will need to bring in an old family photo. The more distressed the photo, the better (i.e. creases, chips, discoloration, fading). Due: Wednesday, January 20, 2016 Project Description: Using the clone stamp tool, paintbrushes, fills, and the multiply mode, restore an old, distressed photo to new life by removing the scars and blemishes and adding full color. Objectives: •Increase skills with Image Adjustments •Improve tonal values and contrast in a photograph •Increase skill with the clone stamp tool. •Use the healing brush tools to fix problematic areas in a photograph •Use the multiply mode to allow for rich, vibrant color in a black and white photograph. •Create photorealistic color relationships. Materials: Adobe Photoshop Parameters: Format as follows: •At least 7 1/2 inches x 10 inches •Resolution: Scan at 600 pixels/inch so that the artwork will eventually be 300 ppi (Important: A lower resolution will result in a printed image of poorer quality.) •Color Mode: RGB Steps (Process): Bring in a distressed (frayed, torn, bleached, stained, creased, faded, etc.) photo. Scan, using the following settings Output Type: Millions of Colors (24 bit) Resolution: 600 dpi When warning box comes up, select "Scan with current resolution," and check "Do not remind me again." Open the file of the scanned image in Photoshop. Adjust the contrast and brightness of the image in Image - Adjustment - Levels. Use the clone stamp, the spot healing brush, and the healing brush to remove dust, scratches and other marks. Change the mode of the photo layer to Multiply. Create a new layer under the photo layer. Paint light, vibrant colors under the photo layer. Tips: Scan at 600 pixels per inch or higher Duplicate the layer containing the original photo, so that you always have the original scan. The top photo layer must be set on MULTIPLY mode, at 100% opacity The color layers should be below that, at 100% opacity ALWAYS use only light, bright colors to paint (from the top left corner of the Color Picker) Grading Criteria: Refer to the grading rubric in the Documents folder. •Level of ambition in selection of photograph (How damaged is it?) •Degree/quality of "fix" - improved values, improved contrast, removal of all unwanted marks •Quality of painting •Visual impact of color 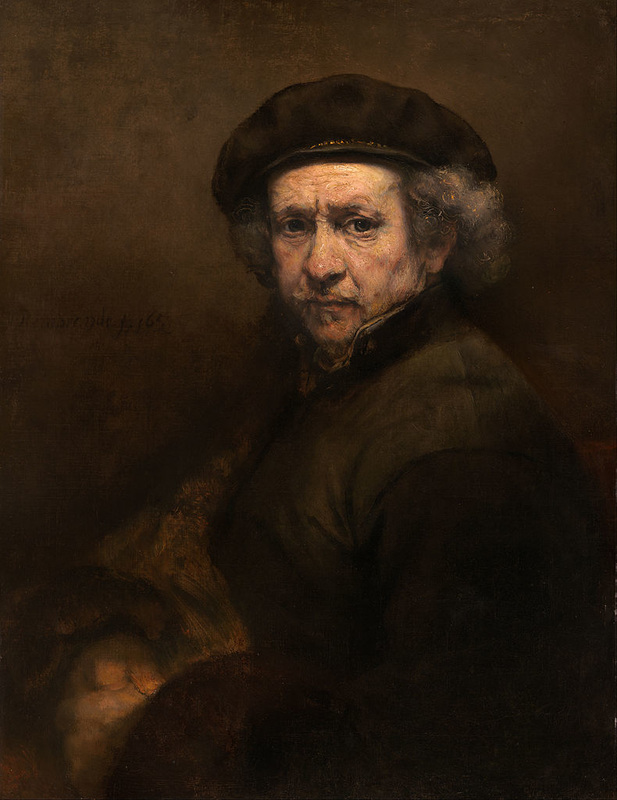 Read about the artist Rembrandt here:
https://www.nga.gov/kids/scoop-rembrandt.pdf Then go to google classroom and answer the questions about Rembrandt 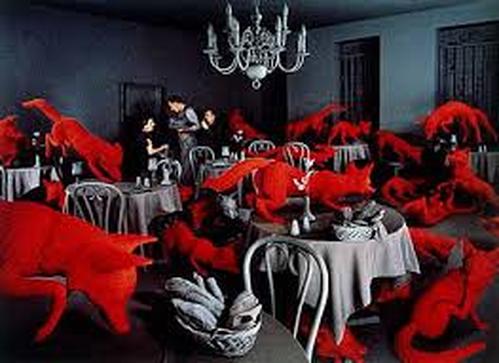 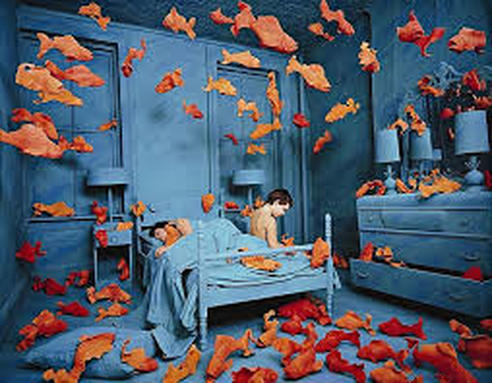 http://www.sandyskoglund.com/
Check out the art work of surreal photography Sandy Skoglund and read her biography here: http://sandyskoglundphotography.weebly.com/biography.html Then go to google classroom and answer the question about her work 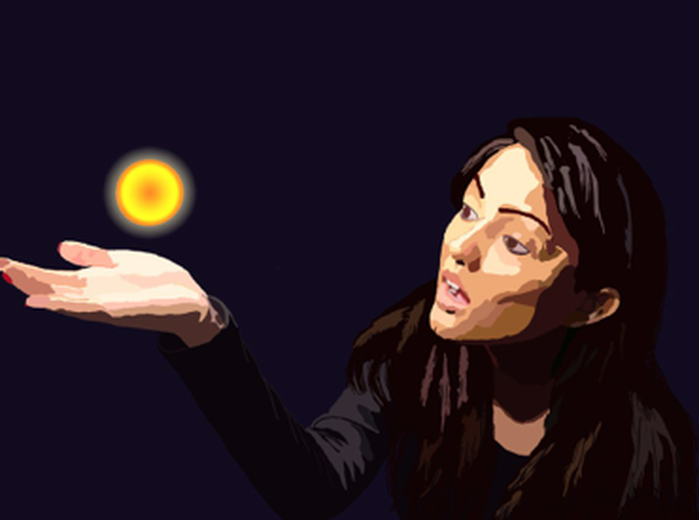 Master Art using Chiaroscuro
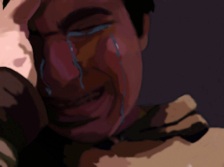
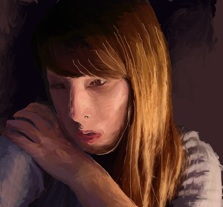
Chiaroscuro is a technique in painting that uses tones, shades, shadows and highlights to create the illusion of three dimensions on two dimensional media. Developed in the [ http://www.wisegeek.com/what-was-the-renaissance.htm ]Renaissance, chiaroscuro comes from the Italian words for bright or clear and dark or obscure. It is usually translated as 'light-dark'. From www.wisegeek.com ORIGIN mid 17th cent.: from Italian, from chiaro ëclear, brightí (from Latin clarus) + oscuro ëdark, obscureí (from Latin obscurus). Project Description: Using the Wacom drawing tablet and stylus, draw and paint an expressive self-portrait from a digital photo that you have a friend take of you. The photo should have a dark background and a single light source directed towards tjhe side of your face. Objectives: •Gain experience with the Wacom drawing tablet. •Create a feeling of natural drawing using digital tools. •Use line expressively. •Create mood through color. •Create the appearance of three-dimensional form via the technique of chiaroscuro. Materials: Adobe Photoshop Parameters: Format as follows: •Width: 7.5 inches •Height: 10 inches ( these measurements are guidelines- feel free to change proportions/size to fit your concept) •Resolution: 300 pixels/inch (Important: A lower resolution will result in a printed image of poorer quality.) •Color Mode: CMYK Steps (Process): Create a new document using the format above. With partner(s), arrange a photograph of yourself with a dark background and a single light source. Upload the photos into Bridge Open the photo in Photoshop. Create a new layer above the photograph layer. Using the drawing tablet, trace the essential parts of the photo. Use line expressively. Using different layers, differentiate the light, middle, and dark tones on the head, neck, and torso. Paint this difference. Grading Criteria: •Proper formatting. •Skill with drawing tablet. Quality/naturalness of line. •Expressiveness of line •Expressiveness of color and style •Three-dimensionality of the form Tips to Get Started: Study the work of Leonardo DaVinci and Michelangelo. Helpful Resources: More information on chiaroscuro can be found at this site: Empty Easel: Chiaroscuro Self Critique Questions: -Before turning in your work, ask yourself: Is my artwork sufficiently expressive? What have I done to create that expressive quality (color, style, quality of line, facial expression, body language?) -Have I mastered the use of the Wacom tablet? i.e. Does my mark-making look natural? -Does the image have enough visual impact? Will it catch and hold a viewer's attention? -Most importantly, have I created a sense of three-dimensional form/volume by using light, middle, and dark tonal values (chiaroscuro)? Surrealism
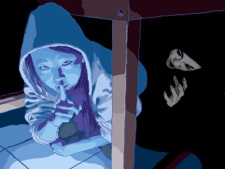
A cultural movement beginning the 1920s that uses visual imagery from the subconscious mind to create art without the intention of logic. Elements present in surrealist imagery:
View the work of Erik Johansson, a modern surrealist photographer: http://www.alltelleringet.com/ Project: Create a surrealist (dream) image based on dreams, memories, obsessions, and feelings. Objectives:
Dimensions: At least letter size (8.5 x 11 inches) Resolution: 300 ppi Color Mode: RGB or CMYK Requirements:
Photograph -- Use a camera or iPad to take a series of photos that you will use to make a surrealistic scene. Take photos of the following:
Remember to:
|

 RSS Feed
Photo used under Creative Commons from wuestenigel
