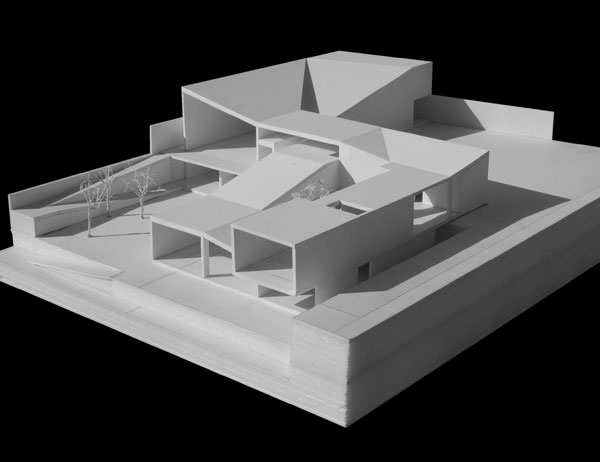
  An architectural model is a type of a scale model, tangible (also called sometimes physical) representation of a structure built to study aspects of an architectural design or to communicate design ideas to clients, committees, and the general public. Architectural models are a tool which may be used for show, presentation, fundraising, obtaining permits, and sale purposes.
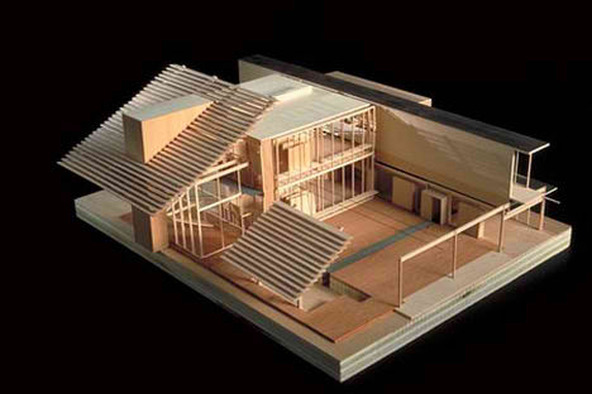
Rough study models can be made quickly using cardboard, wooden blocks, polystyrene, foam, foam boards and other materials. Such models are an efficient tool for three-dimensional understanding of a design, used by architects, interior designers and exhibit designers. For a highly detailed presentation model, architects would employ a professional model maker, model making company or students working for credit. Exterior models are models of buildings which usually include some landscaping or civic spaces around the building. Architectural models are being constructed at much smaller scale than their 1:1 counterpart. Standard architectural scales are different, although some of them are close to the standard scales acknowledged in the model/hobby industry. Such similarities allow us to provide high quality scenery elements for architectural models. Sometimes model railroad scales such as 1:160and 1:87 are used due to ready availability of commercial figures, vehicles and trees in those scales, and models of large buildings are most often built in approximately that range of scales due to size considerations. Models representing 1-2 buildings and a modest piece of surrounding landscape may be built at a larger scale such as 1:50 or even 1:24. Here is a useful *Scale Guide to obtain more information about standard architectural scales and to help with scale selection. The scales and their architectural use is broadly as follows:
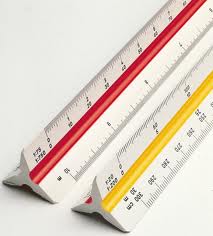
Read this article: http://stuckinstudio.com/resources/55-architectural-model-making-advice-for-students.html Design Challenge: Create an architectural model of your dream house, library redesign or building of your choice Materials: Foam core Balsa Wood Cardboard Xacto knives Rulers Scales Evaluation: Craftsmanship and construction of the model Design of the model Ability to create a scale model Use of time Proper use of materials Your client for this project is the History Department Chair, Todd Whitten, Here is a statement and description of the project and his goals are for the space:
At the present time, the History Hall is a lengthy hallway devoid of character or any indication that it is a place of learning other than the ugly orange lockers that line the hall. In the middle of the hallway is a space that I will call a sub-hallway. It is clearly meant to be a pass-through to the library. There are rooms to the right/east in a cluster that were once offices and are now storage rooms, and we do need to preserve access to those rooms. The door at the front/north end of the sub-hallway leads to a staircase to the library. I am told it must be kept clear for the purposes of fire safety, but the door itself is kept locked all day long and no one on the hallway (myself included) has a key to open it. The walls in the area are blank, and the space is unused. I think the space provides a terrific opportunity for us to utilize for collaboration and to unify the history hall. To that end, I would like it to be less sterile in appearance, and more welcoming in use. I would envision the following: One or two mounted TV’s (secured to the wall and linked with Apple TV). The TV controls should not be available to students, the volume should be on mute with CC on. The TV’s could be used to stream images of students’ work in history classes, news/current events, or to provide students with a way to preview their presentations on a larger screen. Square tables and chairs, not fixed, and not attached to each other, but able to be reconfigured for different use. Both should be functional, not comfortable. There is not a need for fabric covered anything. Ideally, the furniture should be stackable and be able to shrink to a small footprint for when students need the whole space for a project. I’m not looking for a place for people to relax and hang out, and in no way should this space look like a lounge. It should be an extension of the classroom, where teachers can direct students who are doing group work and need to expand beyond the classroom confines, and where students can record skits/performances, or consume media without disrupting classroom activities, and accomplish work they may be doing for classes that are hybrid or on-line. As a result, students should be using this space under the direction of a teacher. If they are not assigned to the space for a part of a class, they should not be there. And teachers will need to come out of the classroom to supervise students who work there. The space should look nice, be painted in appealing colors and have good quality furniture, places for trash, and no food options. (i.e.: no vending machines.) There should be a way for students to stash or store backpacks while working so they are not strewn all over the floor, and there should be a way to plug in and charge devices while they work as well. The space should be well lit, and have no alcoves. There is a lot to do today and this weekend so please read the directions and ask any questions that you may have......
Step 1: Storage Create a dropbox account to keep all of your SketchUp files in ( see notes below) Step 2: Complete Rendering Complete your SketchUp rendering of your dream house. Please save it as yournamedreamhouse.skp and place into the shared folder here: Folder for SketchUp Dream House Step 3: Create jpg of your building and post to your blog Go to file export- then 2D graphic - then select jpg. Then post the image to your blog Step 4: Evaluate your file for 3D printing You created great renderings but your building may not be print ready. You will need to make the walls thicker, delete components, add interior walls, scale your model AND group your model. All walls and edges need to connect. You will need to check every edge. You can also make your building a solid form. Step 5: Export Your file will need to be exported to become an .slt There are two stations in the room with the plugin to do this. You will need to move your file to this computer and than export the file and than open it in it MAKERWARE. In this program we can scale and check your file and prepare it for printing to the Makerbot. Step 6: Save the .stl Pleas place the .slt file here: Folder for STL of Dream House Design Challenge: Redesign your school library
For this assignment we will be entering the Discover Design competition. Please read all of the sections so you understand the competition. http://www.discoverdesign.org/design/instructions/competition2013 Here are the guidelines. Please read all and make sure that you understand the complete competition. http://www.discoverdesign.org/Competition2013 You may start working on this anytime! Objective: Use sketchup to create a digital image of your dream house. Instructions: Watch the video below View other tutorials and email me links to any others that you felt were very helpfulCheck out this page from google listing different resources for learning sketchup: http://support.google.com/sketchup/bin/answer.py?hl=en&answer=36207 Check out/ review the "quick reference card" Download sketchup at home so you can practice Create a 3-d rendering in sketchup of your dream house
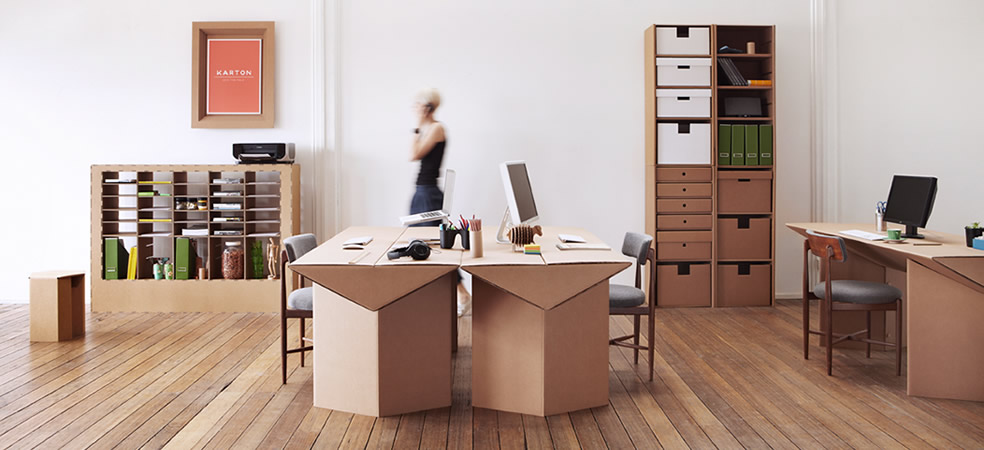
Today you will create sketches (isometric and orthographic) of your cardboard furniture. You will need to create a large number of sketches.
You will then create a prototype of the furniture. By then end of long period today you should have all of these items. Tomorrow each group will present their ideas to the class and be ready for critique. THE MARSHMALLOW CHALLENGE
The RULES 1. ✦Build the Tallest Freestanding Structure: The winning team is the one that has the tallest structure measured from the tabletop surface to the top of the marshmallow. That means the structure cannot be suspended from a higher structure, like a chair, ceiling, or chandelier. 2. ✦The Entire Marshmallow Must Be On Top: The entire marshmallow needs to be on the top of the structure. Cutting or eating part of the marshmallow disqualifies the team. 3. 3. ✦Use as Much or as Little of the Kit: Team can use as many or as few of the 20 spaghetti sticks, as much or as little of the string or tape. The team cannot use the paper bag as part of its structure. 4. ✦Break up the Spaghetti, String or Tape: Teams are free to break the spaghetti and to cut up the tape and string to create new structures. 5. ✦The Challenge Lasts 18 minutes: Teams cannot hold on to the structure when the time runs out. Those touching or supporting the structure at the end of the exercise will be disqualified. http://marshmallowchallenge.com/TED_Talk.html http://marshmallowchallenge.com/Instructions_files/TED2010_Tom_Wujec_Marshmallow_Challenge_Web_Version.pdf Assignment:
Read the following article about design. Write a blog post responding to the article. DESIGN IS A NOUN Unless you live in the wilderness, you are a resident of a human-made environment. Everywhere you look, you can find something that is designed. From the time you wake up to the time you go to sleep, you are sure to encounter design in your everyday life. We are surrounded by design, whether it be objects, spaces, landscapes and streetscapes, or communications or transportation systems. Design is not an instantaneous act or event. Sidewalks and streets do not fall from the sky and land in their proper places. Our toothbrushes do not magically appear in our hands when we need them. Someone is responsible for all the things we consume, use, and interact with everyday. Every moment, we encounter a set of solutions to a problem that has been considered by someone. In your sketchbook write “Design is” at the top. Next, look around the classroom and make note of all the different examples of design that they see. Write each one of these examples down. These could be desks, chairs, books, posters, and clothing, for example. Books are an example of graphic design, while computers and pencils are considered industrial design. You could broaden this exploration to the design of the classroom, which is interior design, or the school building itself, which is architecture. DESIGN IS A VERB “Design” does not only refer to places and things; it is also the process of planning, evaluating, and implementing a plan or solution to a problem. Designers often start with a problem: For example, a school that needs sturdy, affordable chairs for students. The first step in the design process is a brainstorm of possible solutions. This brainstorm could take the form of words, sketches, or even photographs that articulate the designer’s ideas. Once the ideas have been expressed, the designer chooses the best solution for the problem at hand, then consults an engineer, who helps produce a sample. That sample is evaluated, sometimes through user testing, to ensure that the design solution is functionally and aesthetically viable. • Is there value in testing an idea. Have they ever experimented with a new way of doing something? Designers navigate between the aesthetics and functionality of an object through each and every stage of the process from concept to final product. According to designer and artist Ray Eames, “The looks good can change, but what works, works.” [Ray Eames, quoted in “The Work of Charles and Ray Eames: Furniture” (Library of Congress/Vitra Design Museum),http://www.loc.gov/exhibits/eames/furniture.html.] • Have you ever applied this kind of process in your life? Think of an object you consider to be an example of good design and describe it's form and function. Does the object you selected meets your needs in terms of form and function. As consumers of everyday objects, we play an important role in the design process. Although they don’t know each and every one of us personally, designers often look to consumers to evaluate and respond to the things they create, proving their functionality. If consumers are not satisfied with the way something works, they probably won’t want to use it, and designers are keenly aware of this fact. From deciding on a new shape or color for a cell phone to how wide to make the seats on the subway, design firms rely heavily on market research and consumer input, conducting extensive research. Each design problem or situation has a unique set of criteria that must be addressed. Identifying needs or problems, brainstorming possible solutions, testing ideas, and evaluating them are all part of the design process. In some cases an existing idea is refined and in other cases a totally new concept is created, but the processes are similar. With every year that passes, technologies of rendering and manufacturing change. Designers need to be aware of these new and emerging technologies and of how they could affect the design and production of five, five hundred, or five hundred thousand objects. OUTLINE OF THE DESIGN PROCESS Design Process: Defining problems Gathering information and research Generating solutions Evaluating and selecting appropriate solutions Implementing choices Evaluation Integration of feedback www.moma.org/collection, for more examples of design. |
Introduction to Architecture
This full year course for grades 10-12 is an overview of architecture. Course ExpectationsArchives
March 2022
|
||
 RSS Feed
Photos used under Creative Commons from scarletgreen, walknboston, lissalou66, flickr./com/photos/amanda_munoz, shawncampbell, gconservancy, trekkyandy
