 Complete the hand drawing 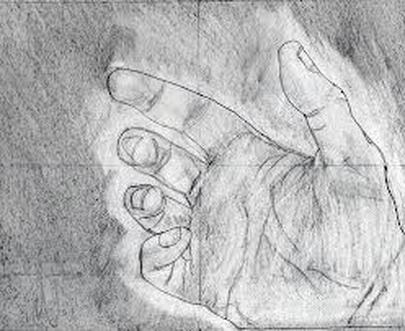 Erase around the edges of the hand 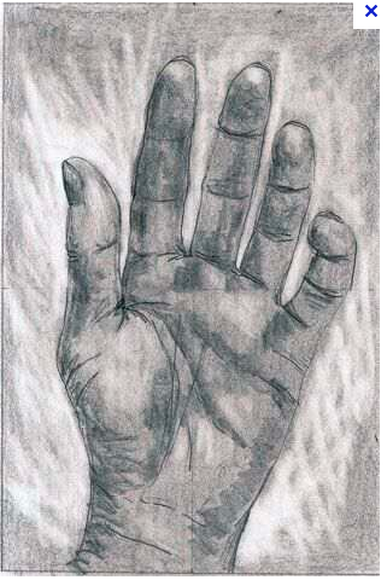 Add dark values to the hand in accurate locations to show the folds and creases of the hand
Use an eraser to subtract the light values of the fingers. 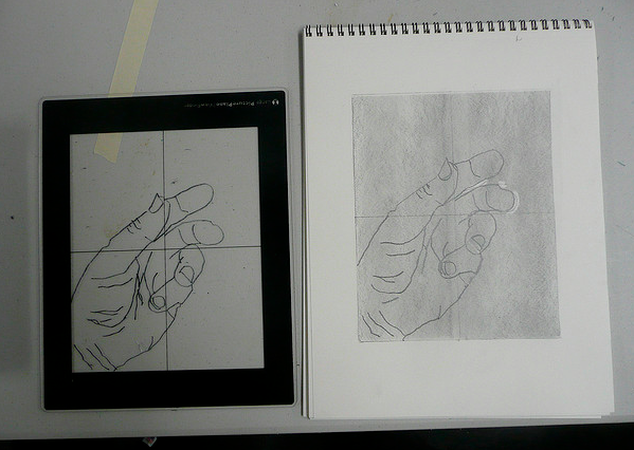 INSTRUCTIONS:
1. Inside of the rectangle that you created on the white paper add tone to the rectangle with a graphite stick. 2. Draw a vertical and horizontal line down the center of the rectangle 3. Redraw the hand on the transparency paper onto the toned rectangle 4. Make the same marks in the same rectangles 5. Take your time and go slowly MATERIALS: Viewfinder White paper Ebony Pencil Eraser 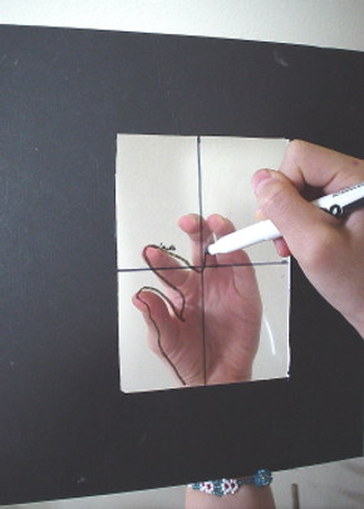 INSTRUCTIONS:
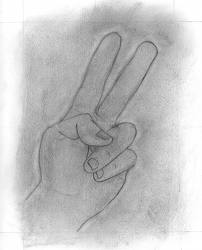
Position your non dominant hand on the table. Fold and bend your fingers to create foreshortening. Lay the viewfinder over your hand. This is difficult. You will need to balance the viewfinder carefully. Using the marker, trace exactly what you see. Draw only the parts of the finger that you see. Include folds, wrinkles and lines. Go SLOWLY! Erase marks if you need to. Materials: Viewfinder Waterbased Marker NOT PERMANENT MARKER 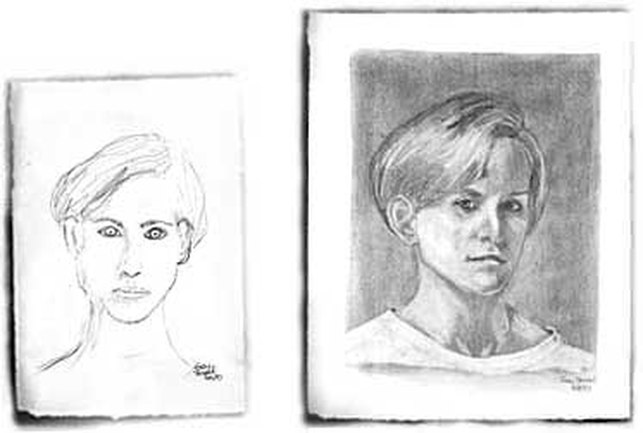 Author and artist Betty Edwards wrote the book " Drawing on the Right Side of the Brain".
Two Ways of Knowing Betty Edwards has used the terms L-Mode and R-Mode to designate two ways of knowing and seeing - the verbal, analytic mode and the visual, perceptual mode - no matter where they are located in the individual brain. You are probably aware of these different characteristics. L-mode is a step-by-step style of thinking, using words, numbers and other symbols. L-mode strings things out in sequences, like words in a sentence. R-mode on the other hand, uses visual information and processes, not step-by-step, but all at once, like recognizing the face of a friend. "You have two brains: a left and a right. Modern brain scientists now know that your left brain is your verbal and rational brain; it thinks serially and reduces its thoughts to numbers, letters and words… Your right brain is your nonverbal and intuitive brain; it thinks in patterns, or pictures, composed of ‘whole things,’ and does not comprehend reductions, either numbers, letters, or words."From The Fabric of Mind, by the eminent scientist and neurosurgeon, Richard Bergland. Viking Penguin, Inc., New York 1985. pg.1 Most activities require both modes, each contributing its special functions, but a few activities require mainly one mode, without interference from the other. Drawing is one of these activities. Learning to draw, then, turns out not to be "learning to draw." Paradoxically, "learning to draw" means learning to make a mental shift from L-mode to R-mode. That is what a person trained in drawing does, and that is what you can learn. Go to the Gallery to view the drawings. Please click on the images to enlarge. http://drawright.com/gallery.htm Instructions: Today you will look in the mirror and create a self portrait drawing using pencil. This is a pre-instruction drawing like the image on the left pictured above.  1. Watch the video " Drawing the Line a Portrait of Keith Haring"
2. Please write and answer the following questions in the design folder that you created on your ipad. Please write in complete sentences when answering the questions. Questions: Who was Keith Haring? What type of art did he create? How would you describe his artwork? How did his artwork change the " art world"? Do you like his artwork? Why or why not? 3. Create a drawing of a figure or group of figures in an action pose in a style similar to Keith Haring's artwork. This may be on paper or on your ipad. 4. Create a collage of 8-10 images of Keith Haring's artwork on your ipad using a collage app of your choice. Use this site for images and ideas haringkids.com 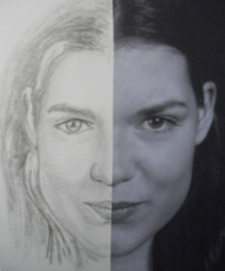 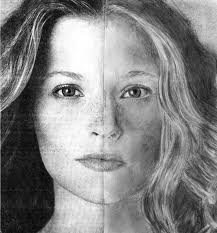 Assignment:
Cut a photograph of a face in half. Create a drawing of the other half of the face to complete the portrait Process:
Materials: Magazines, Scissors, Glue, Pencils, Erasers Evaluation: Ability to render and replicate the other half of the face Ability to measure and create accurate proportions Use of Materials Due Date: Tuesday, June 11 Assignment:
Create a new work of art from your used lino block. Alter your lino block self portrait by using acrylic paint to enhance your self portrait to become a relief sculpture. Process: Carefully select colors and paint the lino block. Apply paint in a variety of ways and with different amounts of paint. Experiment and test the colors. Evaluation: Use of materials Ability to improve and alter a lino block Level of experimentation 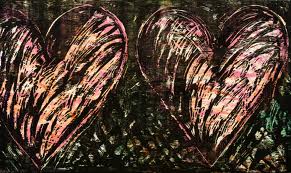 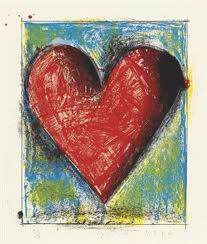 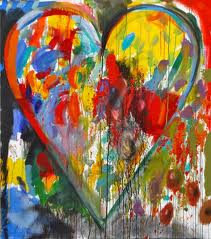 Assignment: Alter one or more of your prints with drawing and or painting materials
Process: 1. Gather the extra prints that you created that may not have qualified as " good prints". Draw on top of the prints with craypas or paint with tempera paint in the negative space. Experiment with various color combinations, complimentary, analogous, etc. 2. Trim the print and mount on black paper and place in the completed work bin Evaluation: Craftsmanship Ability to transform a print with other materials Demonstrate an understanding of the work of Jim Dine Use of Materials Use of Time 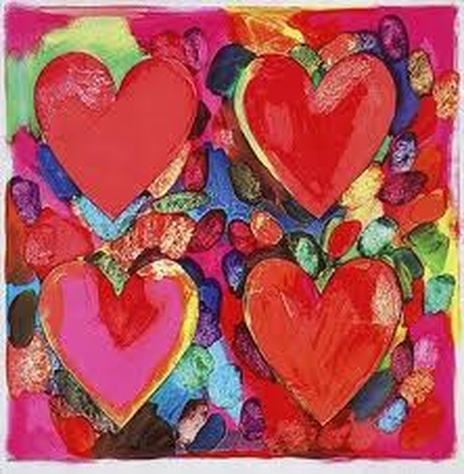
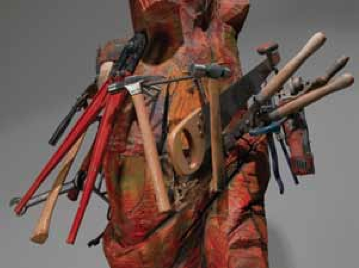
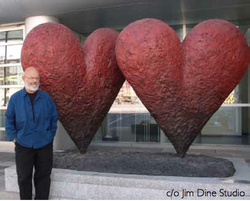 Jim Dine Kennedy Museum of Art, Ohio University, is pleased to announce a major exhibition featuring works by internationally celebrated artist and Ohio University alumnus, Jim Dine.The exhibition Jim Dine: Sculpture and Large Prints initiates a series of events in celebration of the 75th anniversary of the College of Fine Arts. Born in Cincinnati, Dine studied at the University of Cincinnati and at the School of the Museum of Fine Arts in Boston, Massachusetts before receiving his Bachelor of Fine Arts degree from Ohio University in 1957. His reputation in the art world began to grow in 1959 when he, along with Claes Oldenburg and Allan Kaprow, opened a gallery in the Judson Memorial Church (Judson Gallery) in GreenwichVillage in NewYork City and staged a series of theatrical events they called “Happenings.” Dine’s work has been the subject of major surveys and retrospectives in venues spanning the globe, and he is represented in museum collections worldwide.While others have often associated his work with the Pop Art movement of the mid-20th century, his fascination with popular imagery and everyday objects has always carried a more personal component. He has extensively explored particular themes in a variety of media throughout his career, such as the universal symbol of the heart and images of tools.These themes have acquired the status of personal iconography and he claims them as part of his vocabulary or his “glossary of terms.” As an avid reader, writer and poet, he shares,“language plays a big role in my work and has a big place in my life.” Jim Dine’s repeated themes have been called personal “icons.” In art, the term “icon” has changed over time, from its use as “likeness” associated with historical, religious images, to the “symbols” representing computer programs and operations today. Hearts The iconic form of the perfectly symmetrical heart has been a part of Dine’s vocabulary since the mid-1960s. It has appeared prominently in his paintings, drawings and prints as well as in his sculpture. Tools Tools are very important to Dine because they are part of his own self-portrait.When he was growing up in Cincinnati he spent a lot of time in his family’s hardware store, and has said that his earliest memories are of being around hand tools. http://www.ohio.edu/museum/archive/education/resources/JimDineTeacherPacket.pdf 
Please a new file and answer all of the following questions:
1. Where was Jim Dine born? 2. How old is Jim Dine? 3. How many years ago did Jim Dine graduate from Ohio University? 4. What kinds of art does Jim Dine make? ( 5. What materials does Jim Dine use in his artwork? 6. What recurring or repeated images do you see in Jim Dine’s artwork? Create a collage of 5-10 images of his work |
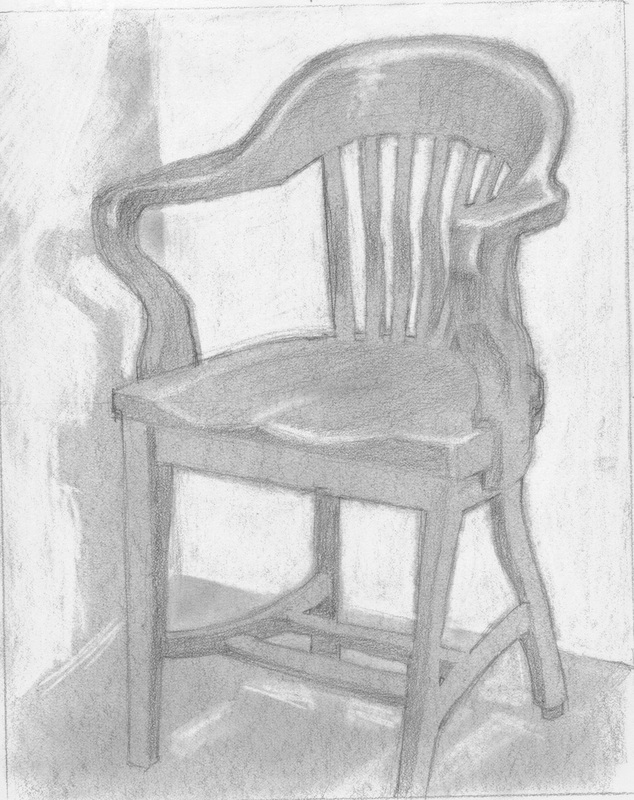
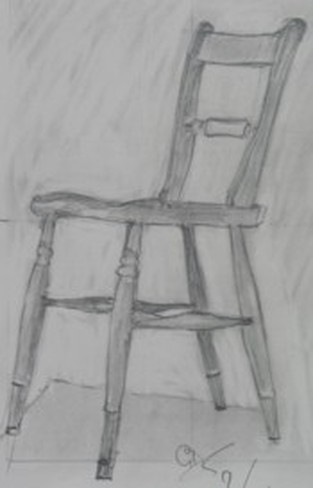
Photos used under Creative Commons from Davide Restivo, half_assed_buddhist, waferboard, Andrea Sartorati
